Monday, November 22, 2010

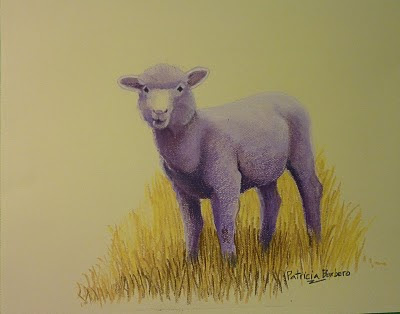
More fun with complementary colours

Meet Harry, a Pig with a Purpose.
He is part of my growing "funny farm" which includes so far 3 sheep and this pig.
Watch for coming attractions: goats, chickens, ducks, pigs. All in fabulous and fashionable complementary colours.
Art doesn't have to be so serious; some fun is allowed and encouraged.

It is painted on PastelMat with soft pastels and measures 0.3 x 0.24m

Friday, November 12, 2010

Underpainting with complementary colours


In this piece I started by using complementary colours throughout the whole painting, maintaining the values in the original reference photo (I used a black and white photocopy to help me see the values better).
So, the sky was different shades of orange, as was the water. The building was green, the shadows were yellow.

The white parts of the clouds were... white. White is not a color - it is light, it has no complementary. Black is not a colour - it is absence of light, it has no complementary either.
When I finished the complementary underpainting, it looked very "interesting", like a Mars landscape... (a "Marscape"?)
So I went back and applied the "real" colour on top, and voila! we are back on Earth - Peggy's Cove, to be precise.

Using complementary colours as an underpainting to a landscape theme adds luminosity to it.
It is painted on sandpaper with soft pastels and measures 0.3 x 0.46m.

Fun with Complementary colours


An orange sheep? Sure! Why not?

Complementary colours sit opposite each other on the colour wheel and "call each other out" to play, they add vibrancy to a painting.

They are pairs of a primary colour (red, yellow and blue) and a secondary colour that does not contain it.
As in: orange (yellow + red) and blue; green (yellow + blue) and red; purple (blue + red) and yellow.
In these examples the colour of the sheep is complementary to the colour of the backgound.
The orange sheep is in a private collection.

Sunday, September 5, 2010

Refreshing your creative spark


Right after I finished this piece I took a vacation from pastel painting and going to painting classes, and choose instead to attend a Raku pottery class.
What a great idea! I had a blast! Working in 3D changed the way I look at things and gave me a new perspective. The process of working with clay and firing the Raku pieces was magical. "Its like a box of chocolates, you never know what you're going to get...". Anyway, I had some clay left over and I've been working in the garage making all sorts of interesting things to fire Raku style (and taking care of my Christmas list in the process). I managed to get this one framed, though, and it looks good.

Saturday, July 10, 2010

Taking classes

There are many ways to learn to paint: from books, videos, regular classes, workshops, to name a few.
I find going to a regular pastel class very beneficial, for a number of reasons. One being that, since I already paid for it, I'm likely to attend and work hard. Another is the group environment, where you get to socialize with fellow students and learn from each other. The obvious one of having a teacher must not be forgotten. I am currently taking classes with Margaret Holland at the Calgary School of Art, and I'm very happy with her instruction.
I use all four aforementioned methods and enjoy them all.

This painting was part of a class project, were we all worked from the same photograph using the same paper (Canson Mi-Teintes). It was interesting to see the results - we each have our own style and the paintings looked very different from one another. Private collection.

Learning from the Masters - take 2

Here is another example of a transcription, this time from Matisse. It doesn't matter what Master you choose to learn from, the exercise will sharpen your skills, increase your confidence and give you a chance to paint without worrying about composition, form or colour. There are many sites on the Internet that have pictures of famous works of art; alternatively your local library will have a vast collection of art books. A color photocopy will be very helpful, specially if you choose to transfer the image onto your paper by applying charcoal or graphite to the back and tracing it. Above all relax and have fun.

Learning from the Masters - take 2

It is a good practise, encouraged in many art schools, to "transcribe" the work of Masters in order to learn from them. For the purpose of learning techniques it is not imperative that you copy the paintings exactly, but that you use the framework of a fully finished painting as a reference point for practising mark making with your pastels.
Van Gogh is one of my favourite painters, and I practise with his work often.
The objective is to develop confidence with the medium, practise techniques as you work, and above all to have fun!

Sunday, May 30, 2010

Surfaces and supports - PastelMat

I find PastelMat to be a very nice surface to work with. It shares the depth of tooth with sandpaper without the harshness. This means that pastels (specially PanPastels) adhere quite well to it, blending and erasing are a bit more difficult and fixatives are not required. Also there is very little dust produced while working on these surfaces, always a good thing.

I call this painting "The leaning Lighthouse of Peggy's Cove", and was created using PanPastels, soft and hard pastels on PastelMat paper.

Surfaces and supports - sandpaper

Here is another example of painting on sandpaper: a Tuscan window overlooking a vineyard.
Painted using PanPastels and hard pastels.

Surfaces and supports - sandpaper

I find artist's quality sandpaper very nice to work with, as long as I don't try to blend with my fingers...
It has a rough surface that pigments adhere to quite well.
It works well with PanPastels, specially if you use the SofftTools that come with them.
This painting or Reader's Rock Garden was done on sandpaper using PanPastels and hard pastels.
Artist's quality sandpaper is not found at your local hardware store, but in your Art Supply stores. It is acid free and of archival quality. Private collection.

Surfaces and supports - paper

Here is another example of painting on coloured paper.
This group of old milk bottles was painted using PanPastels and hard pastels on Ingres green paper.

Surfaces and supports - paper

This painting of a plate of mangoes was done on blue Ingres paper, using PanPastels and soft pastels. The paper colour shows through in places.
Pastel paper comes in many colours, and you can use this to complement your painting.
Private collection.

Surfaces and supports

Pastels are very versatile and can be applied to almost any surface that has some texture for the pastel to hold on to. Shiny stuff will not work!
There are several makes of pastel paper, pastel board, velour paper, sandpaper, and PastelMat.
Some types of pastels work better on certain kinds of papers, I found.
For instance PanPastels are too soft for Strathmore Pastel paper, it just doesn't stick. But it works great on sandpaper or PastelMat.
Or a type of "velour" paper, very soft, like the one used to paint this flower. This velour paper is very interesting to work with, blending is more difficult - and careful planning is required, as erasing is not easy either.
There is so much available these days that can be confusing at first. If you are just starting out exploring the wonderful world of pastels, start with the Strathmore Pastel paper. It comes in assorted colours and is relatively inexpensive. Canson Mi-teintes and Fabriano (these people have been making paper since 1264!) are favourites with most pastelists for their versatility and range of colours.

Sunday, April 11, 2010

Kinds of Pastels

The pigments used in making pastels are the same as the ones used in watercolour, acrylic or oil paints. What is different is the binder used in each case.
Oil pastels contain an oil based binder that makes them dense and greasy. The marks you make with oil pastels can be softened with turpentine. They come in strong colours of limited tone range, and they can be combined with dry pastel to create some interesting effects.

Wax pastels are similar to oil pastels but less moist, as the binder is waxy instead of oily. They can be dissolved with water to create washes for subtle colour mixes.

"Chalk" pastels are not really made of chalk but most often gum tragacanth, a binder used to thicken natural dyes for painting, printing and more. They come in different hardness (a pigment to binder relation) from hard (in sticks and pencil form) to soft (in stick and "pan" form).

There are several manufacturers of pastels and each has its own characteristics.
As an example: NuPastels are hard, Rembrandt are medium, Schminckes are soft and PanPastels ultra soft. You can purchase them in individual sticks and / or boxed sets. There are many brands to choose from, and it can sometimes feel overwhelming.

If you are just starting out, I would suggest you get 2 sets - 1 of hard pastels and 1 of soft ones. You can buy individual sticks as you see the need.

This piece, titled "Fall Colours" was painted on sandpaper using PanPastels and hard pastels. Private collection.

A bit about Pastels

Why do I love pastels?

I find pastels gratifying because of the immediacy of the results.
They are both a drawing and a painting medium and have most of the qualities of both; I can paint quickly and spontaneously, or take my time for more deliberate, detailed work.
No stretching / preparing papers or canvases, no waiting for paint to dry, no varnishing of the finished product to bring out the true colours.
They are economical to use, never dry out, they are easy to store and transport. They come in a great variety of colours and hardness, and they can be combined on the paper itself - no mixing necessary. As they are opaque, you can overpaint and rectify mistakes easily.

You can leave your work and come back to it when you are ready to continue, it will be exactly as you left it - no drying time or colour changes, no need to put things away when you have to take a break.

Although they are generally assumed to be safe and non-toxic - it is best not to breathe too much dust (use a paper face mask) and to wear latex gloves (or Artguard Barrier Cream) to prevent it from getting into your lungs or bloodstream through your hands.

This piece titled "Light House" was painted on 11" x 15" Canson watercolour paper using PanPastels, hard and soft pastels.

Sunday, March 21, 2010

New tools!

Judy Perrin, my teacher at the Calgary School of Art, introduced me to a new type of pastels (new to me, anyway...) called PanPastels.
These are very soft, low dust and highly pigmented pastels that don't come in a stick but in a small round plastic container called a "pan". Looks like makeup, really...
They are applied with specially designed tools called Sofft Tools - different size / shape sponges, some attached to a handle to resemble a paintbrush, some on their own, all intriguing and a lot of fun to work with. Each individual colour comes with a couple of tools; they can be purchased separately as well.
Judy also gave me a few sheets of sandpaper to play with, since I didn't have any at the time.
I've been experimenting with these ever since, having a blast. They blend so well, the colours are so vibrant, the tools are so interesting, the sandpaper holds so much pigment... I use them with my hard and soft pastels, as each kind has its own applications.

For more information on the PanPastels go to their website. Not all art stores carry them, and not all colours are available in Canada at this time. I got my set from Opus Art Supplies online store, my individual colours from Colours in Calgary.
There is also a new kind of paper that works very well with pastels called PastelMat, but I haven't been able to get any yet.
Painted on 10" x 9" sanded paper using PanPastels and hard pastels.

Sunday, March 14, 2010

Working from photographs

I find working from photographs quite enjoyable and convenient, specially in winter. I know that there are artists that prefer 'plain aire' work - I'm not there yet...

Also, there are places I want to paint that I don't have access to at this time, like Europe. Maybe one day I can take a painting tour to Tuscany, who knows? That would be something!

I use my own photographs, or published works in books or travel magazines.
This painting I did from a photo I took myself on a trip to Nova Scotia with my sister. The place is called Peggy's Cove, truly delightful.
Painted on 11" x 14" Strathmore Pastel paper with Faber-Castell Polychroms hard pastels. This painting belongs to a private collector.

Learning from the Masters

There are literally tons of resources out there...
here is a collection of books I borrowed from the local Library, and a couple of my own.
Some of these books have step-by-step instructions that guide me through to the finished painting.

Copying a master's work is also a good exercise, as I don't need to worry about composition and can concentrate on technique instead. I have done a few of those and enjoyed the challenge, and will continue to do so. My favourites are the Impressionists, but there are a lot of contemporary artists whose work I admire.

There are also video recordings of artists teaching different aspects of pastel painting. I find these quite enjoyable and learn a lot from them, especially since each artist has a different approach to the whole process.
Some are on DVD, others can be downloaded from the Internet. I get these from The Artists' Network (see link)
Some of these artists have their own websites and blogs, and share freely of their knowledge.

Then there are the publications: I subscribe to The Pastel Journal, a bi-monthly magazine that I read from cover to cover. There are previous issues for sale in downloadable form, or a whole year on DVD; see link.

I have listed all the books in this photo in the Resources section of this blog.

There are also, of course, dedicated teachers that offer workshops in their studios or teach at Community Centers and Art Schools. I participate in an Open Studio class with Judy Perrin at the Calgary School of Art and I am learning lots and having fun in the process.
Judy is a great teacher, the group is lighthearted and dedicated and the facilities are great. Having the ability of buying your supplies on the spot certainly helps. The Calgary School of Art is located within the Cactus Art Supplies in S. E. Calgary.

Saturday, March 6, 2010

Take 1 and Take 2

Take 1 - top photo.
Next I painted this garden scene, and wasn't really happy with it. So I let it sit for a while...

Take 2 - bottom photo.
After a few weeks I went back to it and this is the result. I like Take 2 better.
Painted with Faber-Castell Polychroms hard pastels on 11" x 14" Strathmore pastel paper

Friday, March 5, 2010

Venetian window


Here is another Venetian window. This time I decided to use some old coloured paper I had lying around since my first try at pastels eons ago... I had a lot of fun with this one. Faber-Castell Polychroms pastels on 14" x 17" Canson sanguine paper.

Venetian window

This was my next painting, of a Venetian window with potted plants. I liked the texture and color of the white wall.
Painted on 11" x 14" Strathmore Pastel paper with Faber-Castell Polychroms hard pastels.

Saturday, February 27, 2010

How it all begun


My very first piece in pastels - not a very good photo, I know, it is all I've got right now.

This is the piece that got me hooked on this medium. I was taking a drawing class at the Wildfrlower Art Center, and pastels was on the "menu". I started working on it and loved it! I was using the wrong type of paper, and maybe the wrong tipe of pastels, but I didn't care... I was having a blast!

The painting was made using Faber-Castell Polychromos hard pastels on Strathmore 14" x 17" paper.

This piece is not available for sale as it belongs to a private collector.

Early Work

One of my earlier works in pastel, it was made using Faber-Castell Polychromos hard pastels on 11" x 14" Strathmore paper. Private collection.